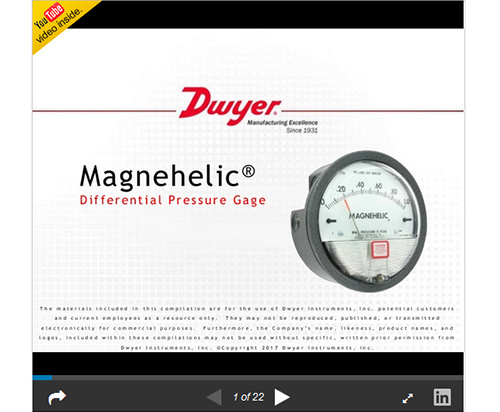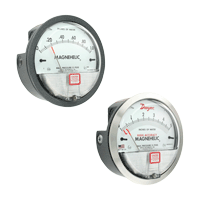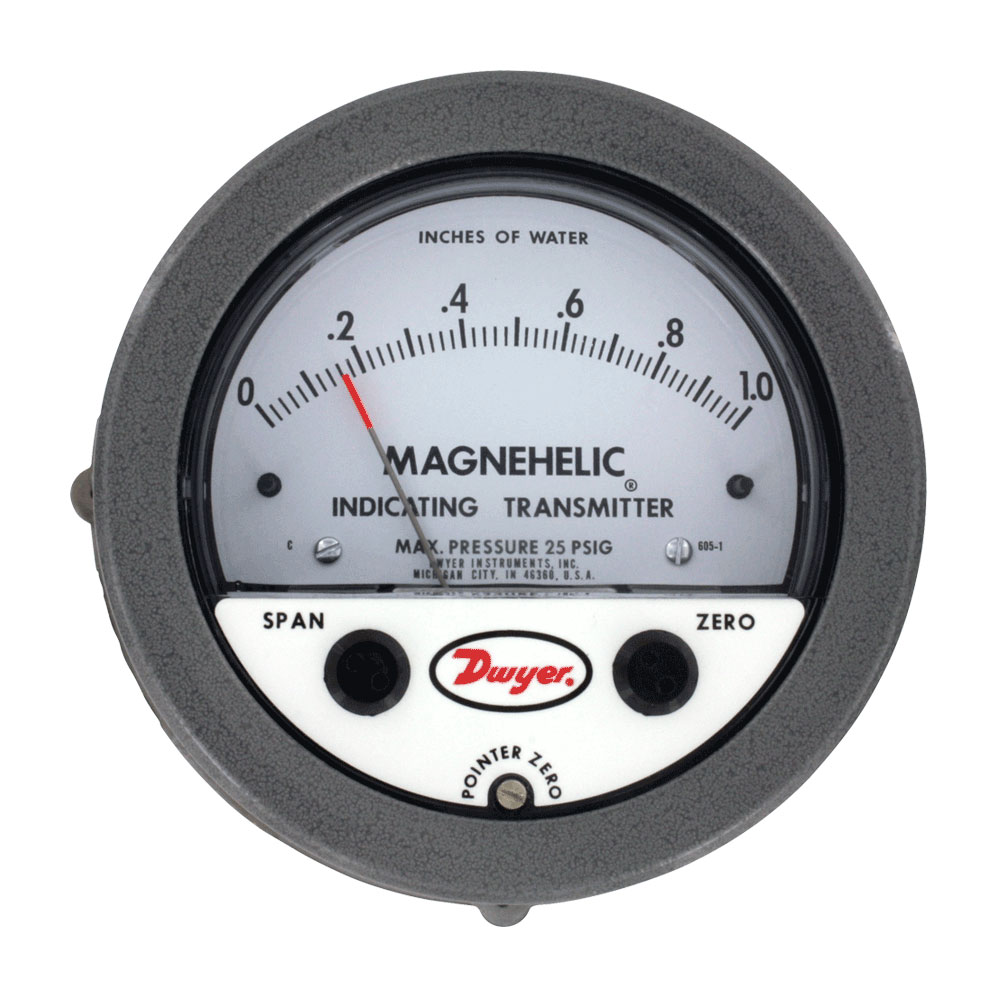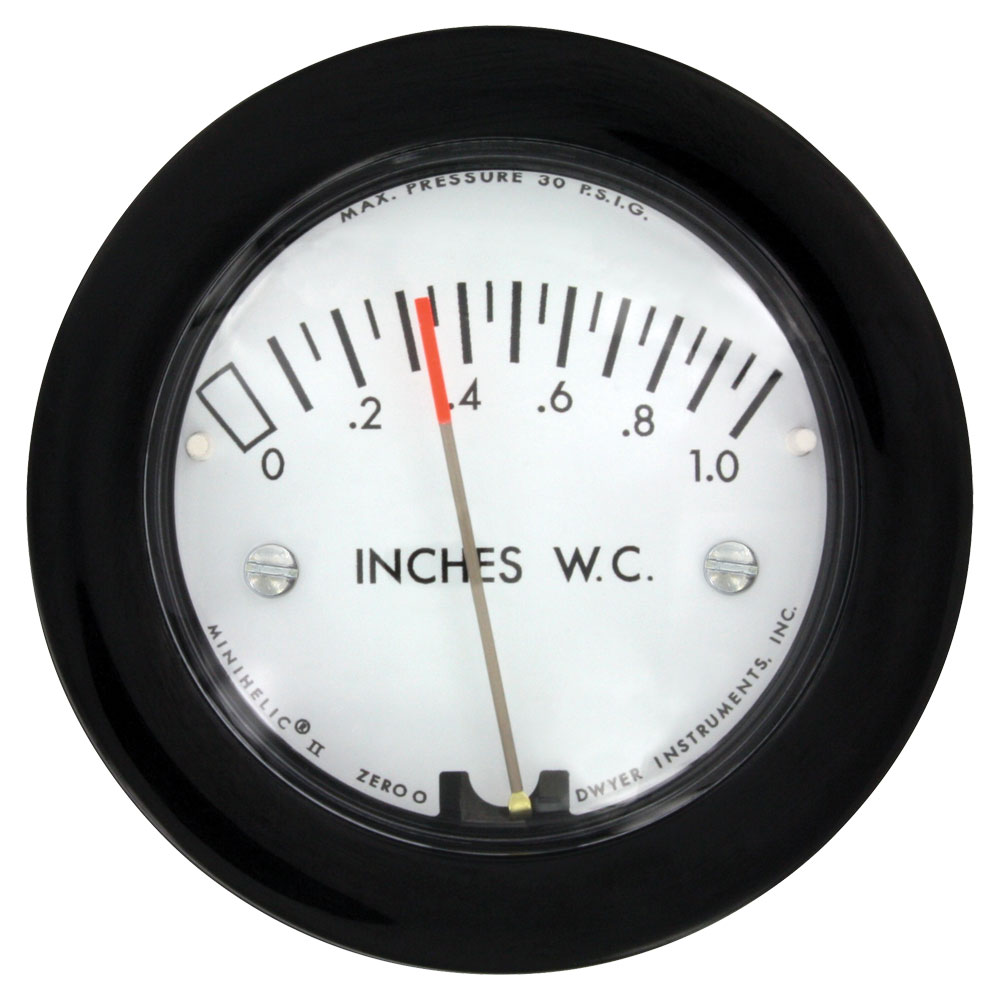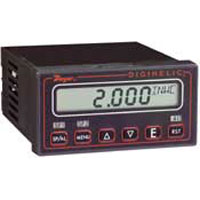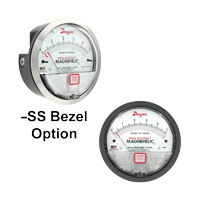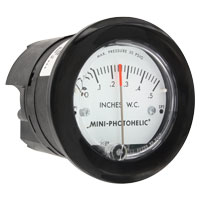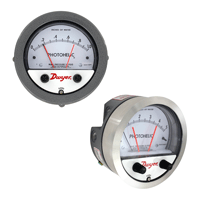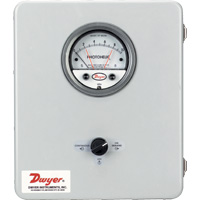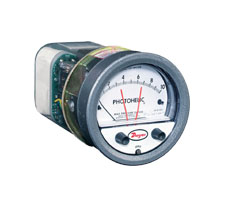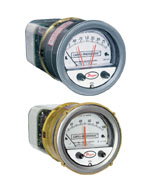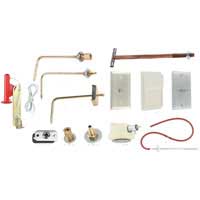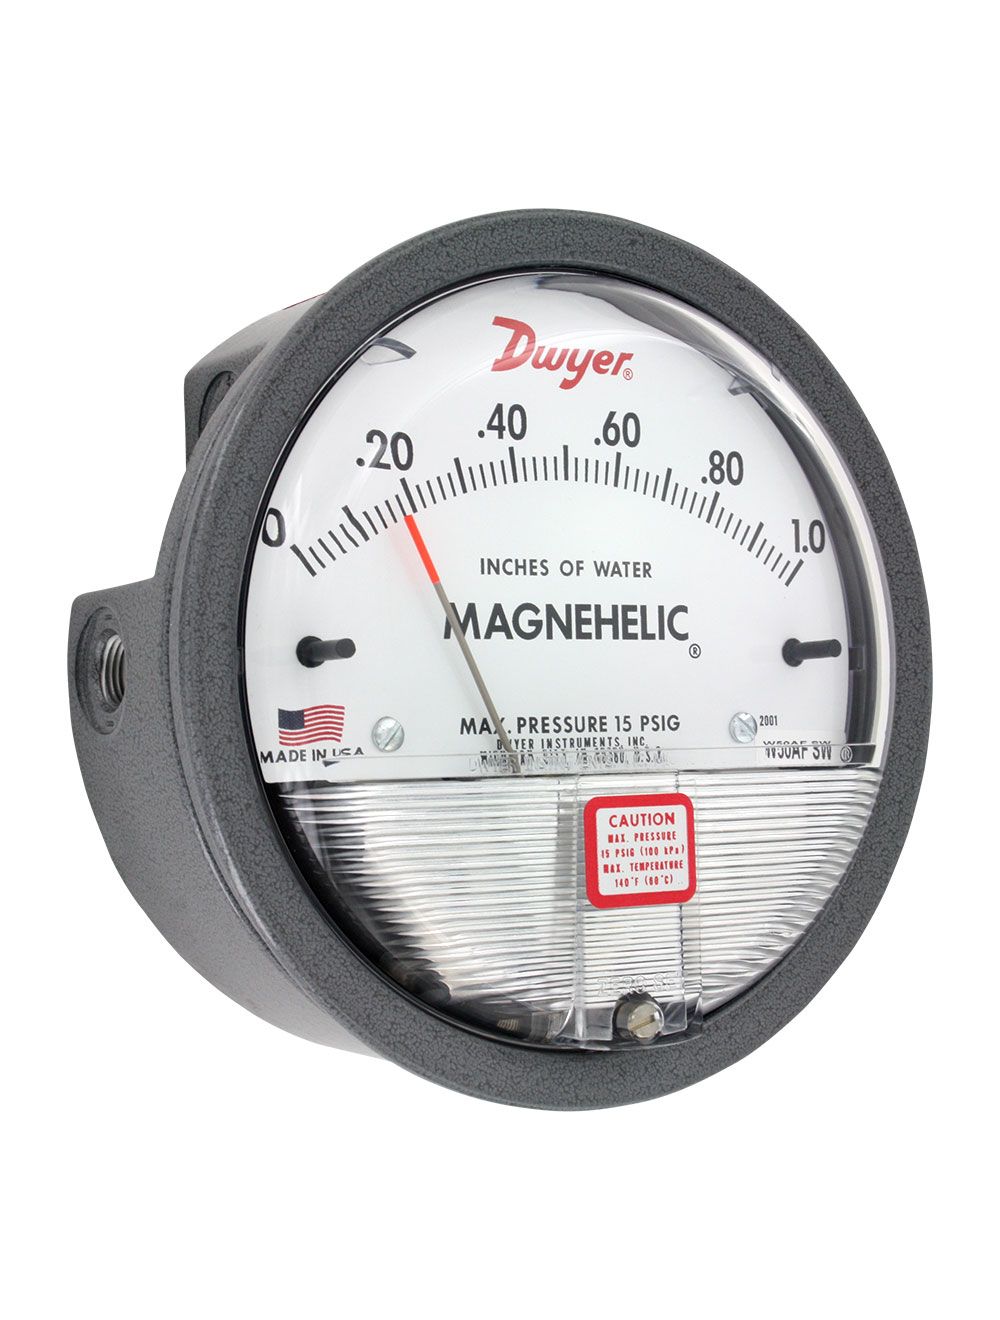
Series 2000 Magnehelic® Differential Pressure Gages
- No Power Required
- Low Cost
- Used in Isolation/ Hospital Environments and Temporary Units (no power required)
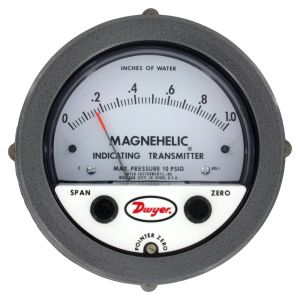
Select the Series 2000 Magnehelic® Gage for a versatile low differential pressure gage with a wide choice of 81 models and 27 options to choose from. Using Dwyer’s simple, frictionless Magnehelic® gage movement, it quickly indicates air or noncorrosive gas pressures--either positive, negative (vacuum) or differential. The design resists shock, vibration, over-pressures and is weatherproof to IP67. Select the -HA High Accuracy Magnehelic® Gage option for an accuracy within 1% of full scale, located below in the Product Configurator. Also included with the –HA option at no extra cost is a mirrored scale overlay and a 6 point calibration certificate.
NIST CALIBRATION available in Product Configurator.
Note: May be used with Hydrogen. Order a Buna-N diaphragm. Pressures must be less than 35 psi.
Please see Series AT-2000 for ATEX approved.Product Applications
- Filter Monitoring
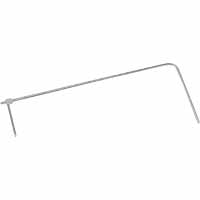
- Air Velocity with Dwyer Pitot Tube
- Blower Vacuum Monitoring
- Fan Pressure Indication
- Duct, Room or Building Pressures
- Clean Room Positive Pressure Indication
Specifications
- Service:
- Air and non-combustible, compatible gases (natural gas option available). Note: May be used with hydrogen. Order a Buna-N diaphragm. Pressures must be less than 35 psi.
- Wetted Materials:
- Consult factory.
- Housing:
- Die cast aluminum case and bezel, with acrylic cover, Exterior finish is coated gray to withstand 168 hour salt spray corrosion test.
- Accuracy:
- ±2% (-HA model ±1) of FS (±3% (-HA ±1.5%) on -0, -100PA, -125PA, -10MM and ±4% (-HA ±2%) on -00, -60PA, -6MM ranges), throughout range at 70°F (21.1°C).
- Pressure Limits:
- -20 in Hg. to 15 psig.† (-0.677 bar to 1.034 bar); MP option: 35 psig (2.41 bar), HP option: 80 psig (5.52 bar).
- Enclosure Rating:
- IP67.
- Overpressure:
- Relief plug opens at approximately 25 psig (1.72 bar), standard gages only. See Overpressure Protection note on Catalog page.
- Temperature Limits:
- 20 to 140°F (-6.67 to 60°C). -20°F (-28°C) with low temperature option.
- Size:
- 4" (101.6 mm) diameter dial face.
- Mounting Orientation:
- Diaphragm in vertical position. Consult factory for other position orientations.
- Process Connections:
- 1/8" female NPT duplicate high and low pressure taps - one pair side and one pair back.
- Weight:
- 1 lb 2 oz (510 g); MP & HP 2 lb 2 oz (963 g).
- Warranty:
- 5 Years.
- Standard Accessories:
- Two 1/8" NPT plugs for duplicate pressure taps, two 1/8" pipe thread to rubber tubing adapters and three flush mounting adapters with screws. (Mounting and snap ring retainer substituted for three adapters in MP & HP gage accessories.)
- Note: For applications with high cycle rate within gage total pressure rating, next higher rating is recommended. See Medium and High pressure options.
Features
- Easy to read gage through undistorted plastic face permits viewing from far away
- Patented design provides quick response to pressure changes means no delay in assessing critical situations
- Durable and rugged housing and high-quality components combine to provide longservice life and minimized down-time
- High accuracy option is twice as accurate as the standard Magnehelic® gage.
- Bezel provides flange for flush mounting in panel.
- Clear plastic face is highly resistant to breakage. Provides undistorted viewing of pointer and scale.
- Precision litho-printed scale is accurate and easy to read.
- Red tipped pointer of heat treated aluminum tubing is easy to see. It is rigidly mounted on the helix shaft.
- Pointer stops of molded rubber prevent pointer over-travel without damage.
- "Wishbone" assembly provides mounting for helix, helix bearings and pointer shaft.
- Jeweled bearings are shock-resistant mounted; provide virtually friction-free motion for helix. Motion damped with high viscosity silicone fluid.
- Zero adjustment screw is conveniently located in the plastic cover, and is accessible without removing the cover. O-ring seal provides pressure tightness.
- Helix is precision made from an alloy of high magnetic permeability. Mounted in jeweled bearings, it turns freely, following the magnetic field to move the pointer across the scale.
- Calibrated range spring is flat spring steel. Small amplitude of motion assures consistency and long life. It reacts to pressure on diaphragm. Live length adjustable for calibration.
- Silicone rubber diaphragm with integrally molded O-ring is supported by front and rear plates. It is locked and sealed in position with a sealing plate and retaining ring. Diaphragm motion is restricted to prevent damage due to overpressures.
- Die cast aluminum case is precision made and iridite-dipped to withstand 168 hour salt spray corrosion test. Exterior finished in baked dark gray hammerloid. One case size is used for all standard pressure options, and for both surface and flush mounting.
- OVERPRESSURE PROTECTION
Blowout plug is comprised of a rubber plug on the rear which functions as a relief valve by unseating and venting the gage interior when over pressure reaches approximately 25 psig (1.7 bar). To provide a free path for pressure relief, there are four spacer pads which maintain 0.023" clearance when gage is surface mounted. Do not obstruct the gap created by these pads. The blowout plug is not used on models above 180" of water pressure, medium or high pressure models, or on gages which require an elastomer other than silicone for the diaphragm. The blowout plug should not be used as a system overpressure control. High supply pressures may still cause the gage to fail due to over pressurization, resulting in property damage or serious injury. Good engineering practices should be utilized to prevent your system from exceeding the ratings of any component. - O-ring seal for cover assures pressure integrity of case.
- Samarium Cobalt magnet mounted at one end of range spring rotates helix without mechanical linkages.
Options
- ASF Adjustable Signal Flag
- HP High Pressure Option
- LT Low Temperatures to -20°F
- MP Med. Pressure Option
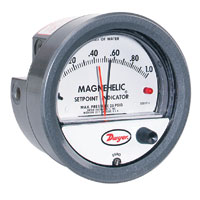
- SP Setpoint Indicator
- Scale Overlays Red, Green, Yellow, Mirrored or Combination, Specify Locations
Mounting and Orientation
A single case size is used for most models of Magnehelic® gages. They can be flush or surface mounted with standard hardware supplied. Standard gages are calibrated in the vertical position, and should be used in that position for maximum stated accuracy. Ranges above 17.5 in w.c. may be used at any angle, and should stay within specified accuracy, by simply re-zeroing. Ranges below 17.5 in w.c. should be ordered using the –TA tilt angle option with the angle specified. These characteristics make Magnehelic® gages ideal for both stationary and portable applications. A 4-9/16" hole is required for flush panel mounting. Complete mounting and connection fittings, plus instructions, are furnished with each instrument.- AHU1 Furnished with attached surface mounting plate
- AHU2 Furnished with attached surface mounting plate and including A-481 installer kit (2 plastic static pressure tips and 7´of PVC tubing)
- CB Chrome bezel option: A chrome plated aluminum bezel for an aesthetically pleasing finish when mounting on metal surfaces such as control panels.
- FC Factory calibration certificate
- NIST NIST traceable calibration certificate
- SB Stainless steel bezel option: 304 stainless steel electro polished Ra 16 finished bezel
- SS Corrosion resistant brushed 304 stainless steel bezel
Product Literature
Manuals
- Instruction Manual - English
- Instruction Manual - Spanish
- Instruction Manual (HP or MP Option)
- Instruction Manual (A-610/Pipe Mtg Kit)
- Instruction Manual (Air Filter Gages)
- Quick Start Guide
Catalog Pages
Product Data Sheet
Product Marketing Material
Approvals
Model Chart
|
EXAMPLE |
2000-00N | ASF | Series 2000-00N-ASF Magnehelic® Differential Pressure Gage, range .05-0-.20" w.c., with adjustable signal flag. |
| RANGE | 2000-00N 2000-00 2000-0 2001 2002 2003 2004 2005 2006 2008 2010 2012 2015 2020 2025 2030 2040 2045 2050 2060 2080 2100 2120 2150 2160 2180 2200 2250 2300 2400 2500 2300-00 2300-0 2301 2302 2304 2305 2306 2308 2310 2312 2316 2320 2330 2340 2350 2360 2380 23100 23150 2000-1FTWC 2000-1.5FTWC 2000-2FTWC 2000-2.5FTWC 2000-3FTWC 2000-4FTWC 2000-5FTWC 2000-6FTWC 2000-8FTWC 2000-10FTWC 2000-12FTWC 2000-12.5FTWC 2000-15FTWC 2000-20FTWC 2000-25FTWC 2000-30FTWC 2000-35FTWC 2000-40FTWC 2000-50FTWC 2000-60FTWC 2000-00D 2000-0D 2001D 2002D 2003D 2004D 2005D 2006D 2008D 2010D 2015D 2020D 2025D 2030D 2040D 2050D 2060D 2100D 2200D 2310D 2000-00AV 2000-0AV 2001AV 2002AV 2005AV 2010AV 2015AV 2020AV 2025AV 2000-00MV 2000-0MV 2001MV 2002MV 2005MV 2008MV 2015MV 2020MV 2024MV 2201 2202 2203 2204 2205 2206 2208 2210 2215 2220 2230 2000-0.25HG 2000-05HG 2000-1HG 2000-1.5HG 2000-2HG 2000-3HG 2000-4HG 2000-5HG 2000-6HG 2000-7HG 2000-8HG 2000-9HG 2000-10HG 2000-11HG 2000-12HG 2000-15HG 2000-16HG 2000-20HG 2000-25HG 2000-30HG 2000-40HG 2000-50HG 2000-60HG 2300-0.5HG 2300-1HG 2300-2HG 2300-10HG 2300-30HG 2000-0.5MMHG 2000-1MMHG 2000-2MMHG 2000-4MMHG 2000-5MMHG 2000-6MMHG 2000-7MMHG 2000-8MMHG 2000-9MMHG 2000-10MMHG 2000-11MMHG 2000-12MMHG 2000-15MMHG 2000-20MMHG 2000-25MMHG 2000-30MMHG 2000-35MMHG 2000-40MMHG 2000-50MMHG 2000-60MMHG 2000-80MMHG 2000-100MMHG 2000-150MMHG 2000-200MMHG 2000-250MMHG 2000-300MMHG 2000-350MMHG 2000-400MMHG 2300-60MMHG 2000-6MM 2000-8MM 2000-10MM 2000-12MM 2000-15MM 2000-20MM 2000-25MM 2000-30MM 2000-35MM 2000-40MM 2000-50MM 2000-60MM 2000-75MM 2000-80MM 2000-100MM 2000-125MM 2000-150MM 2000-200MM 2000-250MM 2000-300MM 2000-350MM 2000-375MM 2000-400MM 2000-500MM 2000-600MM 2000-700MM 2000-750MM 2000-800MM 2000-1000MM 2000-1200MM 2000-1500MM 2000-1600MM 2000-1800MM 2000-2000MM 2000-3000MM 2000-4000MM 2000-5000MM 2300-6MM 2300-10MM 2300-12MM 2300-14MM 2300-20MM 2300-30MM 2300-40MM 2300-50MM 2300-60MM 2300-80MM 2300-100MM 2300-150MM 2300-160MM 2300-200MM 2300-250MM 2300-300MM 2300-320MM 2300-400MM 2300-450MM 2300-500MM 2300-600MM 2300-700MM 2300-750MM 2300-800MM 2300-1000MM 2000-1.5CM 2000-2CM 2000-2.5CM 2000-3CM 2000-4CM 2000-5CM 2000-6CM 2000-8CM 2000-10CM 2000-15CM 2000-20CM 2000-25CM 2000-30CM 2000-35CM 2000-40CM 2000-50CM 2000-60CM 2000-80CM 2000-100CM 2000-125CM 2000-150CM 2000-200CM 2000-250CM 2000-300CM 2000-350CM 2000-400CM 2000-500CM 2000-600CM 2000-700CM 2000-1000CM 2300-2CM 2300-3CM 2300-4CM 2300-5CM 2300-10CM 2300-20CM 2300-30CM 2300-40CM 2300-50CM 2300-60CM 2300-80CM 2300-100CM 2000-60NPA 2000-30PA 2000-60PA 2000-100PA 2000-125PA 2000-150PA 2000-200PA 2000-250PA 2000-300PA 2000-350PA 2000-400PA 2000-500PA 2000-700PA 2000-750PA 2000-800PA 2000-1000PA 2000-100x10PA 2000-1250PA 2000-125X10PA 2000-1500PA 2000-150X10PA 2000-2000PA 2000-200X10PA 2000-2500PA 2000-250X10PA 2000-3000PA 2000-300X10PA 2000-4500PA 2000-450X10PA 2000-5000PA 2000-500X10PA 2000-6000PA 2000-600X10PA 2000-8000PA 2000-800X10PA 2300-60PA 2300-80PA 2300-100PA 2300-120PA 2300-200PA 2300-250PA 2300-300PA 2300-400PA 2300-500PA 2300-600PA 2300-1000PA 2300-1200PA 2300-1400PA 2300-2000PA 2300-200X10PA 2300-3000PA 2300-300X10PA 2300-5000PA 2300-500X10PA 2300-6000PA 2300-600X10PA 2000-0.1KPA 2000-0.2KPA 2000-0.3KPA 2000-0.5KPA 2000-1KPA 2000-1.25KPA 2000-1.5KPA 2000-2KPA 2000-2.5KPA 2000-3KPA 2000-3.5KPA 2000-4KPA 2000-5KPA 2000-6KPA 2000-8KPA 2000-10KPA 2000-12KPA 2000-12.5KPA 2000-15KPA 2000-20KPA 2000-25KPA 2000-30KPA 2000-35KPA 2000-40KPA 2000-50KPA 2000-60KPA 2000-70KPA 2000-75KPA 2000-80KPA 2000-100KPA 2000-140KPA 2000-170KPA 2000-200KPA 2300-0.4KPA 2300-1KPA 2300-2KPA 2300-2.5KPA 2300-3KPA 2300-4KPA 2300-5KPA 2300-6KPA 2300-7KPA 2300-7.5KPA 2300-8KPA 2300-10KPA 2300-12KPA 2300-16KPA 2300-20KPA 2000-1MBAR 2000-1.5MBAR 2000-2MBAR 2000-2.5MBAR 2000-3MBAR 2000-4MBAR 2000-5MBAR 2000-6MBAR 2000-8MBAR 2000-10MBAR 2000-12MBAR 2000-15MBAR 2000-20MBAR 2000-25MBAR 2000-30MBAR 2000-35MBAR 2000-40MBAR 2000-50MBAR 2000-60MBAR 2000-75MBAR 2000-80MBAR 2000-100MBAR 2000-125MBAR 2000-150MBAR 2000-200MBAR 2000-250MBAR 2000-300MBAR 2000-350MBAR 2000-400MBAR 2000-500MBAR 2000-600MBAR 2000-700MBAR 2000-800MBAR 2000-1000MBAR 2300-2MBAR 2300-3MBAR 2300-4MBAR 2300-5MBAR 2300-6MBAR 2300-10MBAR 2300-20MBAR 2300-24MBAR 2300-30MBAR 2300-40MBAR 2300-50MBAR 2300-60MBAR 2300-70MBAR 2300-80MBAR 2300-100MBAR 2300-500MBAR 2000-0.5ZPSI 2000-1ZPSI 2000-2ZPSI 2000-3ZPSI 2000-4ZPSI 2000-6ZPSI 2000-8ZPSI 2000-10ZPSI 2000-15ZPSI 2000-16ZPSI 2000-20ZPSI 2000-30ZPSI 2000-32ZPSI 2000-40ZPSI 2000-50ZPSI 2000-80ZPSI 2000-100ZPSI 2300-2ZPSI 2000-0.2BAR 2000-0.5BAR 2000-1BAR 2000-1.5BAR 2000-2BAR 2000-0.5KG 2000-1KG 2000-1.5KG 2000-2KG 2000-10VF1 2000-10VF2 2000-10VF3 2000-10VF4 2000-10VF5 2000-20VF1 2000-20VF2 2000-20VF3 2000-20VF4 2000-20VF5 2000-40VF1 2000-40VF2 2000-40VF3 2000-40VF4 2000-40VF5 |
05-0-.20" w.c. 0-.25" w.c. 0-.5" w.c. 0-1" w.c. 0-2" w.c. 0-3" w.c. 0-4" w.c. 0-5" w.c. 0-6" w.c. 0-8" w.c. 0-10" w.c. 0-12" w.c. 0-15" w.c. 0-20" w.c. 0-25" w.c. 0-30" w.c. 0-40" w.c. 0-45" w.c. 0-50" w.c. 0-60" w.c. 0-80" w.c. 0-100" w.c. 0-120" w.c. 0-150" w.c. 0-160" w.c. 0-180" w.c. 0-200" w.c. 0-250" w.c. 0-300" w.c. 0-400" w.c. 0-500" w.c. 0.125-0-0.125" w.c. 0.25-0-0.25" w.c. 0.5-0-0.5" w.c. 1-0-1" w.c. 2-0-2" w.c. 2.5-0-2.5" w.c. 3-0-3" w.c. 4-0-4" w.c. 5-0-5" w.c. 6-0-6" w.c. 8-0-8" w.c. 10-0-10" w.c. 15-0-15" w.c. 20-0-20" w.c. 25-0-25" w.c. 30-0-30" w.c. 40-0-40" w.c. 50-0-50" w.c. 75-0-75" w.c. 0-1 ft w.c. 0-1.5 ft w.c. 0-2 ft w.c. 0-2.5 ft w.c. 0-3 ft w.c. 0-4 ft w.c. 0-5 ft w.c. 0-6 ft w.c. 0-8 ft w.c. 0-10 ft w.c. 0-12 ft w.c. 0-12.5 ft w.c. 0-15 ft w.c. 0-20 ft w.c. 0-25 ft w.c. 0-30 ft w.c. 0-35 ft w.c. 0-40 ft w.c. 0-50 ft w.c. 0-60 ft w.c. 0-0.25" w.c. & 0-62 Pa 0-0.5" w.c. & 0-125 Pa 0-1" w.c. & 0-250 Pa 0-2" w.c. & 0-500 Pa 0-3" w.c. & 0-750 Pa 0-4" w.c. & 0-1 kPa 0-5" w.c. & 0-1.25 kPa 0-6" w.c. & 0-1.5 kPa 0-8" w.c. & 0-2 kPa 0-10" w.c. & 0-2.5 kPa 0-15" w.c. & 0-3.7 kPa 0-20" w.c. & 0-5 kPa 0-25" w.c. & 0-5.2 kPa 0-30" w.c. & 0-7.5 kPa 0-40" w.c. & 0-10 kPa 00-50" w.c. & 0-12.4 kPa 0-60" w.c. & 0-15 kPa 0-100" w.c. & 0-25 kPa 0-200" w.c. & 0-50 kPa 5-0-5" w.c. & 1.25-0-1.25 kPa 0-0.25" w.c. & 0-2000 fpm 0-0.5" w.c. & 0-2800 fpm 0-1" w.c. & 0-4000 fpm 0-2" w.c. & 0-5600 fpm 0-5" w.c. & 0-8800 fpm 0-10" w.c. & 0-12500 fpm 0-15" w.c. & 0-15500 fpm 0-20" w.c. & 0-17500 fpm 0-25" w.c. & 0-20000 fpm 0-60 Pa & 0-9.8 m/s 0-125 Pa & 0-14.4 m/s 0-250 Pa & 0-20 m/s 0-500 Pa & 0-28 m/s 0-1.25 kPa & 0-45 m/s 0-2 kPa & 0-57 m/s 0-3.5 kPa & 0-76 m/s 0-5 kPa & 0-90 m/s 0-6 kPa & 0-98 m/s 0-1 psid 0-2 psid 0-3 psid 0-4 psid 0-5 psid 0-6 psid 0-8 psid 0-10 psid 0-15 psid 0-20 psid 0-30 psid 0-.25" Hg 0-.5" Hg 0-1" Hg 0-1.5" Hg 0-2" Hg 0-3" Hg 0-4" Hg 0-5" Hg 0-6" Hg 0-7" Hg 0-8" Hg 0-9" Hg 0-10" Hg 0-11" Hg 0-12" Hg 0-15" Hg 0-16" Hg 0-20" Hg 0-25" Hg 0-30" Hg 0-40" Hg 0-50" Hg 0-60" Hg 0.25-0-0.25" Hg 0.5-0-0.5" Hg 1-0-1" Hg 5-0-5" Hg 15-0-15" Hg 0-0.5 mm Hg 0-1 mm Hg 0-2 mm Hg 0-4 mm Hg 0-5 mm Hg 0-6 mm Hg 0-7 mm Hg 0-8 mm Hg 0-9 mm Hg 0-10 mm Hg 0-11 mm Hg 0-12 mm Hg 0-15 mm Hg 0-20 mm Hg 0-25 mm Hg 0-30 mm Hg 0-35 mm Hg 0-40 mm Hg 0-50 mm Hg 0-60 mm Hg 0-80 mm Hg 0-100 mm Hg 0-150 mm Hg 0-200 mm Hg 0-250 mm Hg 0-300 mm Hg 0-350 mm Hg 0-400 mm Hg 30-0-30 mm Hg 0-6 mm w.c. 0-8 mm w.c. 0-10 mm w.c. 0-12 mm w.c. 0-15 mm w.c. 0-20 mm w.c. 0-25 mm w.c. 0-30 mm w.c. 0-35 mm w.c. 0-40 mm w.c. 0-50 mm w.c. 0-60 mm w.c. 0-75 mm w.c. 0-80 mm w.c. 0-100 mm w.c. 0-125 mm w.c. 0-150 mm w.c. 0-200 mm w.c. 0-250 mm w.c. 0-300 mm w.c. 0-350 mm w.c. 0-375 mm w.c. 0-400 mm w.c. 0-500 mm w.c. 0-600 mm w.c. 0-700 mm w.c. 0-750 mm w.c. 0-800 mm w.c. 0-100 x 10 mm w.c. 0-120 x 10 mm w.c. 0-150 x 10 mm w.c. 0-160 x 10 mm w.c. 0-180 x 10 mm w.c. 0-200 x 10 mm w.c. 0-300 x 10 mm w.c. 0-400 x 10 mm w.c. 0-500 x 10 mm w.c. 3-0-3 mm w.c. 5-0-5 mm w.c. 6-0-6 mm w.c. 7-0-7 mm w.c. 10-0-10 mm w.c. 15-0-15 mm w.c. 20-0-20 mm w.c. 25-0-25 mm w.c. 30-0-30 mm w.c. 40-0-40 mm w.c. 50-0-50 mm w.c. 75-0-75 mm w.c. 80-0-80 mm w.c. 100-0-100 mm w.c. 125-0-125 mm w.c. 150-0-150 mm w.c. 160-0-160 mm w.c. 200-0-200 mm w.c. 225-0-225 mm w.c. 250-0-250 mm w.c. 300-0-300 mm w.c. 350-0-350 mm w.c. 375-0-375 mm w.c. 400-0-400 mm w.c. 500-0-500 mm w.c. 0-1.5 cm w.c. 0-2 cm w.c. 0-2.5 cm w.c. 0-3 cm w.c. 0-4 cm w.c. 0-5 cm w.c. 0-6 cm w.c. 0-8 cm w.c. 0-10 cm w.c. 0-15 cm w.c. 0-20 cm w.c. 0-25 cm w.c. 0-30 cm w.c. 0-35 cm w.c. 0-40 cm w.c. 0-50 cm w.c. 0-60 cm w.c. 0-80 cm w.c. 0-100 cm w.c. 0-125 cm w.c. 0-150 cm w.c. 0-200 cm w.c. 0-250 cm w.c. 0-300 cm w.c. 0-350 cm w.c. 0-400 cm w.c. 0-500 cm w.c. 0-600 cm w.c. 0-700 cm w.c. 0-100 x 10 cm w.c. 1-0-1 cm w.c. 1.5-0-1.5 cm w.c. 2-0-2 cm w.c. 2.5-0-2.5 cm w.c. 5-0-5 cm w.c. 10-0-10 cm w.c. 15-0-15 cm w.c. 20-0-20 cm w.c. 25-0-25 cm w.c. 30-0-30 cm w.c. 40-0-40 cm w.c. 50-0-50 cm w.c. 10-0-50 Pa 0-30 Pa 0-60 Pa 0-100 Pa 0-125 Pa 0-150 Pa 0-200 Pa 0-250 Pa 0-300 Pa 0-350 Pa 0-400 Pa 0-500 Pa 0-700 Pa 0-750 Pa 0-800 Pa 0-1000 Pa 0-100 x 10 Pa 0-1250 Pa 0-125 x 10 Pa 0-1500 Pa 0-150 x 10 Pa 0-2000 Pa 0-200 x 10 Pa 0-2500 Pa 0-250 x 10 Pa 0-3000 Pa 0-300 x 10 Pa 0-4500 Pa 0-450 x 10 Pa 0-5000 Pa 0-500 x 10 Pa 0-6000 Pa 0-600 x 10 Pa 0-8000 Pa 0-800 x 10 Pa 30-0-30 Pa 40-0-40 Pa 50-0-50 Pa 60-0-60 Pa 100-0-100 Pa 125-0-125 Pa 150-0-150 Pa 200-0-200 Pa 250-0-250 Pa 300-0-300 Pa 500-0-500 Pa 600-0-600 Pa 700-0-700 Pa 1000-0-1000 Pa 100-0-100 x 10 Pa 1500-0-1500 Pa 150-0-150 x 10 Pa 2500-0-2500 Pa 250-0-250 x 10 Pa 3000-0-3000 Pa 300-0-300 x 10 Pa 0-0.1 kPa 0-0.2 kPa 0-0.3 kPa 0-0.5 kPa 0-1 kPa 0-1.25 kPa 0-1.5 kPa 0-2 kPa 0-2.5 kPa 0-3 kPa 0-3.5 kPa 0-4 kPa 0-5 kPa 0-6 kPa 0-8 kPa 0-10 kPa 0-12 kPa 0-12.5 kPa 0-15 kPa 0-20 kPa 0-25 kPa 0-30 kPa 0-35 kPa 0-40 kPa 0-50 kPa 0-60 kPa 0-70 kPa 0-75 kPa 0-80 kPa 0-100 kPa 0-140 kPa 0-170 kPa 0-200 kPa 0.2-0-0.2 kPa 0.5-0-0.5 kPa 1-0-1 kPa 1.25-0-1.25 kPa 1.5-0-1.5 kPa 2-0-2 kPa 2.5-0-2.5 kPa 3-0-3 kPa 3.5-0-3.5 kPa 3.75-0-3.75 kPa 4-0-4 kPa 5-0-5 kPa 6-0-6 kPa 8-0-8 kPa 10-0-10 kPa 0-1 Millibar 0-1.5 Millibar 0-2 Millibar 0-2.5 Millibar 0-3 Millibar 0-4 Millibar 0-5 Millibar 0-6 Millibar 0-8 Millibar 0-10 Millibar 0-12 Millibar 0-15 Millibar 0-20 Millibar 0-25 Millibar 0-30 Millibar 0-35 Millibar 0-40 Millibar 0-50 Millibar 0-60 Millibar 0-75 Millibar 0-80 Millibar 0-100 Millibar 0-125 Millibar 0-150 Millibar 0-200 Millibar 0-250 Millibar 0-300 Millibar 0-350 Millibar 0-400 Millibar 0-500 Millibar 0-600 Millibar 0-700 Millibar 0-800 Millibar 0-100 x 10 Millibar 1-0-1 Millibar 1.5-0-1.5 Millibar 2-0-2 Millibar 2.5-0-2.5 Millibar 3-0-3 Millibar 5-0-5 Millibar 10-0-10 Millibar 12-0-12 Millibar 15-0-15 Millibar 20-0-20 Millibar 25-0-25 Millibar 30-0-30 Millibar 35-0-35 Millibar 40-0-40 Millibar 50-0-50 Millibar 250-0-250 Millibar 0-0.5 ounces per square inch 0-1 ounces per square inch 0-2 ounces per square inch 0-3 ounces per square inch 0-4 ounces per square inch 0-6 ounces per square inch 0-8 ounces per square inch 0-10 ounces per square inch 0-15 ounces per square inch 0-16 ounces per square inch 0-20 ounces per square inch 0-30 ounces per square inch 0-32 ounces per square inch 0-40 ounces per square inch 0-50 ounces per square inch 0-80 ounces per square inch 0-100 ounces per square inch 1-0-1 ounces per square inch 0-0.20 bar 0-0.5 bar 0-1 bar 0-1.5 bar 0-2 bar 0-0.5 kg/cm² 0-1 kg/cm² 0-1.5 kg/cm² 0-2 kg/cm² 0-10" w.c. & 0-20 SCFM air (w/1" NPT Tube) 0-10" w.c. & 0-50 SCFM air (w/1.5" NPT Tube) 0-10" w.c. & 0-85 SCFM air (w/2" NPT Tube) 0-10" w.c. & 0-200 SCFM air (w/3" NPT Tube) 0-10" w.c. & 0-350 SCFM air (w/4" NPT Tube) 0-20" w.c. & 0-30 SCFM air (w/1" NPT Tube) 0-20" w.c. & 0-70 SCFM air (w/1.5" NPT Tube) 0-20" w.c. & 0-120 SCFM air (w/2" NPT Tube) 0-20" w.c. & 0-290 SCFM air (w/3" NPT Tube) 0-20" w.c. & 0-500 SCFM air (w/4" NPT Tube) 0-40" w.c. & 0-40 SCFM air (w/1" NPT Tube) 0-40" w.c. & 0-100 SCFM air (w/1.5" NPT Tube) 0-40" w.c. & 0-160 SCFM air (w/2" NPT Tube) 0-40" w.c. & 0-395 SCFM air (w/3" NPT Tube) 0-40" w.c. & 0-675 SCFM air (w/4" NPT Tube) |
|
| OPTIONS | ASF AHU1 AHU2 AT BUNA CB COO FC G HA HC HP IC LT M MP NIST R RM SB SF SPCL SS ST TA VIT Y |
Adjustable Signal Flag Mounting Plate Only Mounting Plate with A-481 Accessory Kit Aluminum Tag Buna-N Elastomers Chrome Bezel Certificate of Origin Factory Calibration Certificate Green Scale Overlay High Accuracy Horizontal Calibration (90 Deg Face Up) High Pressure Impregnated Case Low Temperature Mirror Scale Overlay Medium Pressure NIST Traceable Calibration Certificate Red Scale Overlay Replacement Mag for Venturi Flow Tubes Only 304 Stainless Steel Bezel Silicone Free Special Cleaning Brushed 304SS Bezel Stainless Steel Tag Tilt Angle from Vertical in Degrees Fluoroelastomers Yellow Scale Overlay |
Questions
- Question
- How will installation of a Magnehelic® gage 150' away from the pressure source affect accuracy?
- Answer
- Accuracy will not be affected, but response time will be increased in proportion to the length of the tubing.
- Related
- Question
- Can the standard Magnehelic® or Capsuhelic® gage be installed outdoors?
- Answer
- Yes. Front covers are sealed with "O" rings. Capsuhelic vent holes are plugged with foam, and the new high impact acrylic lens material is very resistant to ultra-violet fogging. Additional care is recommended to lead pressure connections downward from the gage and provide as much protection from the elements as possible
- Related
- Question
- Can a standard Magnehelic® gage be used for natural gas or propane service?
- Answer
- No. As the silicone diaphragm will be attacked by these gases. A Buna-N diaphragm should be specified.
- Related
- Question
- What happens when a Magnehelic® gage equipped with the low temperature option is operated below -20 degrees Fahrenheit (-29 degrees Celsius)?
- Answer
- Below that temperature the accuracy of the gage deteriorates beyond our published specification due to stiffening of the diaphragm.
- Related
- Question
- Is National Institute of Standards and Technology traceability available for the Magnehelic® Gage?
- Answer
- No. But Magnehelic® gages can be given a special 6 point calibration check with an NIST traceable master gage and a certificate can be supplied.
- Related
- Question
- How do I hook up my Magnehelic® Gage?
- Answer
- In Bulletin A-27 under operation, it explains how to connect the Magnehelic to the following applications: positive pressure, negative pressure, and differential pressure.
- Related
- Question
- Your Magnehelic gauge doesn't come with a calibration certificate, do you have any documentation for these gauges to meet these needs?
- Answer
- We have 3 options: (1) We can supply a Certificate of Conformance at no charge if you request that certificate at the time of order. The Certificate of conformance would state that each Magnehelic gauge is calibrated to meet the specifications stated on the spec sheet. (2) We offer a factory calibration “-FC” as an option that is a certificate of the standard calibration points at the time of manufacture, for a small fee. (3) We can also provide a NIST-traceable calibration for an extra charge per gage if that is required. To get the NIST-traceable calibration, you would simply add a “-NIST” to the end of your part number. NIST-traceable calibrations will come with the 6 point calibration certificate. We recommend “periodic calibration” for our Magnehelic, though we leave the specific time-frame up to the end user, since different organizations have different requirements (i.e. government groups often require more frequent calibrations.) If you choose to have the NIST traceable calibration done, the NIST group (the National Institute of Standards and Technology) dictates yearly calibration and it will be printed on the certificate.
- Related
- Question
- I am looking to measure velocity in a 4" pipe that is used as air conveyance. We use an eductor and a single stage blower to produce air flow. I am looking to measure pressure and velocity. I purchased a Dwyer Pitot tube, 167-7 108024-00 for the job, and I want to match with the right gauge. I need to be in the range of 2600 cuft/min at maybe 0.5psi. Can you direct me to the right gauge with that information?
- Answer
- To monitor flow through your 4” pipe, you will have to size the appropriate differential pressure gage. A very common gage that is used will be our Series 2000 Magnehelic gage. This gage can be ordered with a square root output that will direct read in flow units. Upon ordering this part, you will have to specify the maximum differential pressure at your desired flow rate. The following text will bring you to the equations necessary to compute this differential (velocity) pressure. This can also be found in the APPLICATION GUIDES section of our website.
- Related
- Question
- I have a Magnehelic gage 2000-00N I purchased for a clean room. Should the installers set the "set" screw to get the gage back to (0) or will that mess up the calibration? My invoice # if you need to look at what I purchased is 04844623.
- Answer
- After the Magnehelic has been installed, disconnect pressure lines to vent both sides of the gage to the atmosphere and re-zero. This will not mess up the calibration. This should be done occasionally.
- Related
- Question
- What restrictions, if any, are imposed for the Magnehelic® and Photohelic® gages in vacuum service?
- Answer
- In applications involving higher vacuums than 20" Hg, leakage due to gage housing porosity becomes the limiting factor.
- Related
- Question
- How do I hook up my Magnehelic® gage for an air velocity application with a pitot tube?
- Answer
- In our Application Guides on flow products, we explain very well how to take air velocity readings. The total pressure connection on the pitot tube is connected to one of the high pressure ports on the gage. The other high pressure port is plugged. The static pressure connection on the pitot tube is connected to one of the low pressure ports on the gage. The other low pressure port is plugged.
- Related
- Question
- Are air velocity scales available?
- Answer
- Yes, the information we require to supply the proper range is the velocity (fpm or m/s) or velocity pressure (inches of water or kpa) and density of air (lb/ft3 or g/cm3).
- Related
- Question
- Why must Dwyer pressure switches be mounted with the diaphragm in the vertical plane?
- Answer
- In other than a vertical plane, the diaphragm can sag and cause a shift in set-point or a change in the adjustable set-point range. The switch may even fail to reset at the minimum set-points. This is the same phenomena that causes inaccuracy in Magnehelic® and Capsuhelic® gages when mounted in other than a vertical position.
- Related
- Question
- What might be the cause for Magnehelic® gages filling approximately 1/3 full of water, with lots of liquid droplets on the glass. Both are outside mounted on the side of an air stripping tower. One is a differential pressure gage that measures the pressure drop across a pitot tube. The other just measures the back pressure in the stripper. What can be done to fix the malfunction?
- Answer
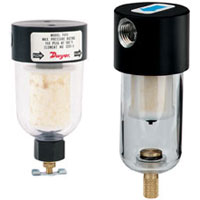
- It looks like you’re getting some condensation in the Magnehelic®, which is causing it to collect on the bottom of the face. Since the Magnehelic® is not encapsulated, it is not recommended to be used in applications where moisture can form. One option to fix the problem is installing a liquid filter (like an F222) to filter out that moisture. Another option is to install a Capsuhelic (Series 4000), which is made to handle both air and liquid.
- Related
- Question
- Can the ASF option be used as a tattle tell? Or do you have something that could be used as a tattle tell on the 2000 series DP gages?
- Answer
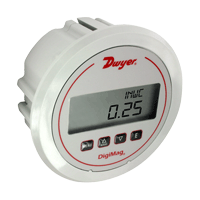
- The ASF option cannot be used as a tattle tell. It is just there for visual indication of a set point. We have nothing with our 2000 series that can act as a tattle tell, however our series DM-1000 DigiMag will have a peak valve function built in.
- Related
- Question
- I have a Dwyer Magnehelic, can I pressure test a furnace gas valve with natural gas with this instrument?
- Answer
- The standard Magnehelic is not recommended for use with natural gas. For natural gas applications, we would recommend a Magnehelic with a Buna-N diaphragm and an oil impregnated case for better chemical compatibility and a reduced leak rate respectively.
- Related
- Question
- For the Series 2000 Magnehelic Differential Pressure Gauges, what panel mounts are compatible with the A-135 rubber gasket?
- Answer
- Any of our panel or flush mounting brackets will work with the A-135 rubber gasket. The rubber gasket just gives you a tight seal between the Magnehelic’s bezel and the bracket.
- Related
- Question
- Is the Magnehelic 2000 suitable for use in a Class 1 Div 1 environment?
- Answer
- No, the 2000 Series Magnehelic Differential Pressure Gauge does not have any certifications officially allowing it to be used in a Class 1 Div 1 environment.
- Related
- Question
- Calibration details?
- Answer
- Standard gages are calibrated in the vertical position, and should be used in that position for maximum stated accuracy. Ranges above 17.5 in w.c. may be used at any angle, and stay within specified accuracy, by simply re-zeroing. Ranges below 17.5 in w.c. should be ordered using the –TA tilt angle option with the angle specified.
- Related
- Question
- I have a model 2004 without the pressure relief plug, is it possible to acquire one?
- Answer
- The part number for the blowout plug is 440651-01.
- Related
- Question
- We use the model 2310 & Mount Ring A-286, I'm looking for a 3D or STP file for both. The current models I have are lacking in detail.
- Answer
- All of our available drawings are on our Website, under the Drawings tab. We do offer a 3-D drawing for Series 2000 and for A-286. The drawing for Series 2000 is a generic drawing.
- Related
- Question
- While using the model 2300-00 to measure negative pressure, when looking at the gauge how would I know the area is under negative pressure.
- Answer
- The needle will move below zero, and not above zero. Left hand movements from zero are negative, and right hand movements from zero are positive.
- Related
- Question
- Is there a differential pressure gage with a lower temperature limit down to -20F?
- Answer
- Yes, the 2000 series with a -LT option for low temperature will be rated down to -20 F.
- Related
- Question
- What is the best method of measuring actual air flow in process ducts to verify process air flow sensors (differential pressure sensors, air flow stations, etc.)
- Answer
- There are two ways to measure air flow in process ducts. The most common means is the use of a Series 2000 Magnehelic® Differential Pressure Gage. This gage can be ordered with a square root output that will read in flow units. You will have to specify the maximum differential pressure at your desired flow rate. Along with the gage, a pitot tube (connected by means of rubber or vinyl tubing) is also used. The pitot tube must be pointed directly into the air stream. Care must be taken to ensure that the pitot tube should be inserted at least 8-1/2 duct diameters downstream from elbows, bends or other obstructions which cause turbulence. The alternative method uses a 100 AV Durablock® Air Velocity Gage kit. The kit includes a manometer, a stainless steel pitot tube, rubber tubing with connectors, and red gage fluid. The pitot tube, pointed directly into the air stream, senses total and static pressure. The manometer then senses velocity pressure (difference between total and static pressure).
- Related
| Model | Description | Availability* | Price | |
|---|---|---|---|---|
| A-135 | Silicone rubber gasket for panel mounting (Series 2000, DM-2000, DM-1000, 605) | 1-3 days* |
$5.90 |
|
| A-286 | 4-1/2" Gage panel mounting flange | 1-3 days* |
$17.10 |
|
| A-299 | Mounting bracket flush mount Magnehelic® gage in bracket. Bracket is then surface mounted . Steel with gray hammertone epoxy finish. 6.3" x 7.7" x 4.0", 1.30 lb. | 1-3 days* |
$44.50 |
|
| A-300 | Flat aluminum bracket for flush mounting Magnehelic® gage. 6.8" x 6.0" x .1", .35 lb. | 1-3 days* |
$39.25 |
|
| A-310A | 3-way vent valve, plastic, 1/8" NPT to 1/4" metal tubing, 80 psi rating, replaces former Model A-310 (brass). 2.3" x .8" x .1", .10 lb. | 1-3 days* |
$25.75 |
|
| A-320-A1 | Weatherproof enclosure, ABS, compatible with Series 2000 Magnehelic®, includes 2 sections of precut silicone tubing, banjo fittings, and threaded pressure connections pre-installed. | 1-3 days* |
$259.10 |
|
| A-320-B1 | Weatherproof enclosure, ABS, compatible with Series 3000MR/MRS Photohelic®, Series 605 Magnehelic®, Series DH3 Digihelic® (to fit, the casing on the electrical plug must be removed), Series 2000 Magnehelic® with medium and high pressure options | 1-3 days* |
$347.15 |
|
| A-320-A-SS | Instrument enclosure, 304SS, brushed finish, compatible with 2000 Magnehelic® gage | 6-7 Weeks* |
$892.35 |
|
| A-320-B-SS | Instrument enclosure, 304SS, brushed finish, compatible with 2000 Magnehelic® gage, DM-2000 differential pressure transmitter | 1-3 days* |
$902.30 |
|
| A-320-BC | Weatherproof enclosure, ABS, compatible with Series 2000 Magnehelic®, DM-1000 DigiMag®, DM-2000, Series 605 (with -SS option), instruments with backwards compatible bezel option | 1-3 days* |
$347.15 |
|
| A-321 | Brass safety relief valve, protects Magnehelic® gage or Photohelic® switch/gage against over pressure due to regulator failure, etc, opens at 10 psi. Mounts in tee fitting. 1/4" NPT(M) (use two for DP application). .5" x .5" x 1.5", .10 .lb | 1-3 days* |
$61.00 |
|
| A-368 | Surface mounting plate, aluminum, for Magnehelic® gage. | 1-3 days* |
$11.25 |
|
| A-369 | Stand-hang bracket, aluminum, for Magnehelic® gage. | 1-3 days* |
$17.75 |
|
| A-371 | Surface mounting bracket, use with Photohelic® switch/gage on horizontal or vertical surfaces, also for Capsu-Photohelic® switch/gage on vertical only. Also Magnehelic® -MP, -HP models. | 1-3 days* |
$56.00 |
|
| A-401 | Plastic carrying case (7-9/16" x 5-7/8" x 2-13/16"). | 1-3 days* |
$38.25 |
|
| A-432 | Plastic carrying case for Magnehelic® gage of standard range, except high pressure connection, includes 9 ft (2.7m) of 3/16" ID rubber tubing, stand-hang bracket & terminal tube with holder. 9.1" x 7.4" x 3.6", 1.30 .lb | 1-3 days* |
$68.50 |
|
| A-448 | 3-piece magnet kit for mounting Magnehelic® gage directly to a magnetic surface, 3.3" x 1.7" x .5", .20 .lb | 1-3 days* |
$16.00 |
|
| A-464 | Flush mount kit for Magnehelic® gages (Magnehelic® sold separately) | 1-3 days* |
$30.25 |
|
| A-464-SS | Stainless steel flush mounting kit for the Magnehelic® gages (Magnehelic® sold separately) | 1-3 days* |
$140.15 |
|
| A-481 | Installer kit, (includes 2 static pressure tips and PVC tubing). | 1-3 days* |
$7.15 |
|
| A-605 | Air filter kit - adapts any standard Magnehelic® gage for use as an air filter gage. Includes aluminum surface mounting bracket with screws, (2) 5 ft (1.5 m) lengths of 1/4" aluminum tubing, (2) static pressure tips & (2) molded plastic vent valves. | 1-3 days* |
$53.50 |
|
| A-605B | Air filter kit with (2) plastic open/close valves, (2) 4" steel static tips, tubing & mounting flange | 1-3 days* |
$42.00 |
|
| A-605C | Air filter kit with (2) plastic open/close valves, (2) plastic static tips, tubing & mounting flange | 1-2 Weeks* |
$33.00 |
|
| A-607 | Mounting panel for Magnehelic® | 1-2 Weeks* |
$6.90 |
|
| A-610 | Pipe mounting kit for 1-1/4" to 2" pipe. 5.6" x 4.6" x 1.4", 1.0 .lb (Magnehelic® sold separately) | 1-3 days* |
$39.25 |
|
| 200068-51 | Mounting hardware kit for standard Magnehelics® (not MP or HP). Included in the kit: 2 each: A-339 adapters, A-330 pipe adapters; 3 each: mounting lugs, long screws, short screws) | 1-3 days* |
$13.25 |
